I’m using Blender 3.2.1 and Unreal Engine 4.27.2. I’m no expert in either, so it is quite possible that there are easier or better ways to achieve the same result.
Let’s start by making some very simple model in blender that we will animate and export.
Before we actually model anything we will set scene unit scale to 0.01, so it matches Unreals 1cm/unit.
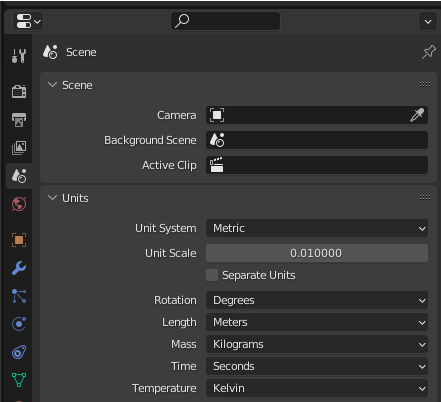
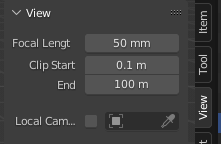
Additionally Clip Start and End should be adjusted or stuff will be cut off.
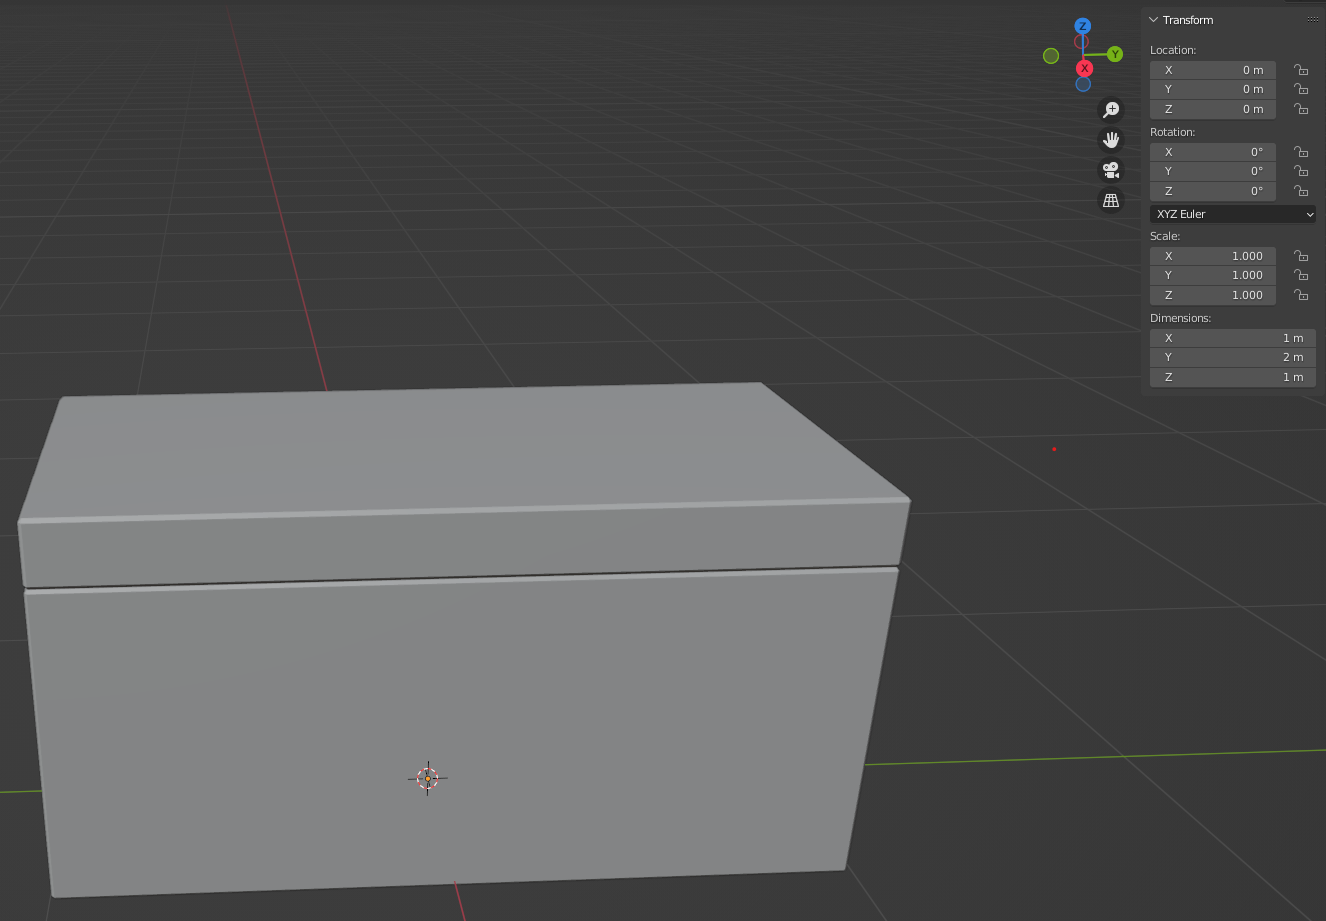
We will use a simple 1x2x1m boxy chest with a lid that we will animate later
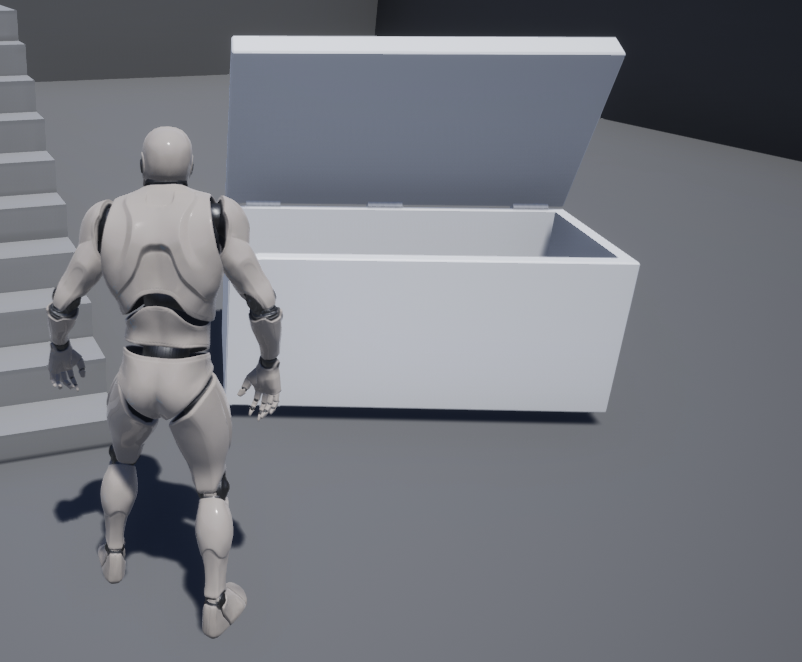
On Unreal side we will use fresh Third Person Template project with a scaled Cube that will serve as something to compare our exported model to.

Lets export our model to see if the dimensions match. From Blender export menu we will select FBX.
We will use following settings:
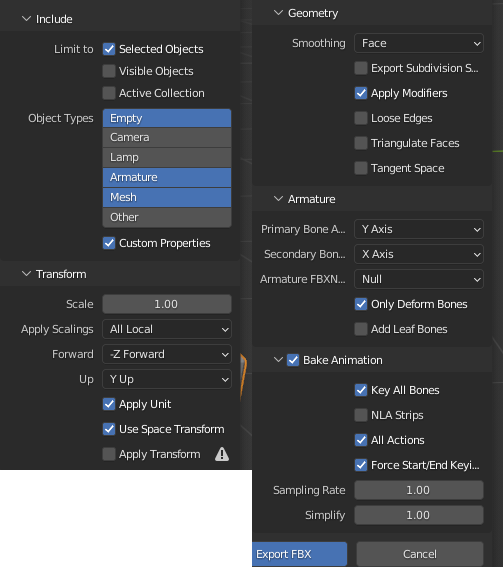
- Include
Selected Objectsmainly useful when you have multiple models in one .blend fileObject types, we only need mesh and armature to start. Empty will be used for LoD importCustom propertieswill be needed for LoD import
- Transform
- Defaults are fine here, however it might be needed to change Forward/Up values if your model ends up with unexpected orientation in Unreal. Quite likely when LoDs are involved
- Geometry
- We change
SmoothingtoFaceto fix import warnning in Unreal
- We change
- Armature
- we do want
Only Deform Bones - and we don’t need extra
leaf bones
- we do want
- Bake Animation
- we don’t need
NLA strips
- we don’t need
Export the model somewhere and import in Unreal with default options, it will be setup as regular static mesh at this point. Easiest way to get there is to save it to somewhere in Content directory so it is picked up automatically.
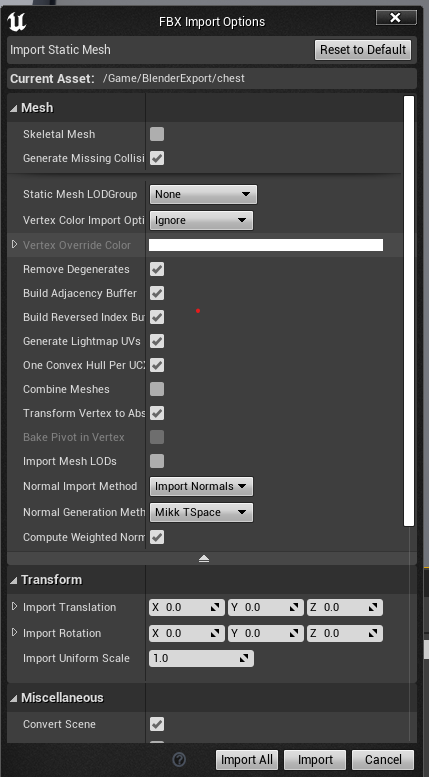
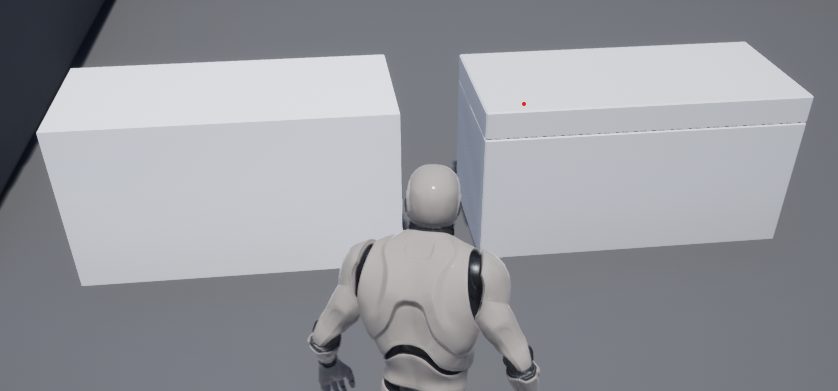
Once it is imported we can put it next to our fake chest to see how it looks like. Size matches perfectly! We will deal with materials next time…
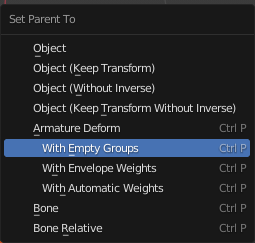
Now we can add some animations to see how to deal with them. First lets add armature to the scene and parent our chest to it. We use empty groups as automatic weights work best for organic shapes.
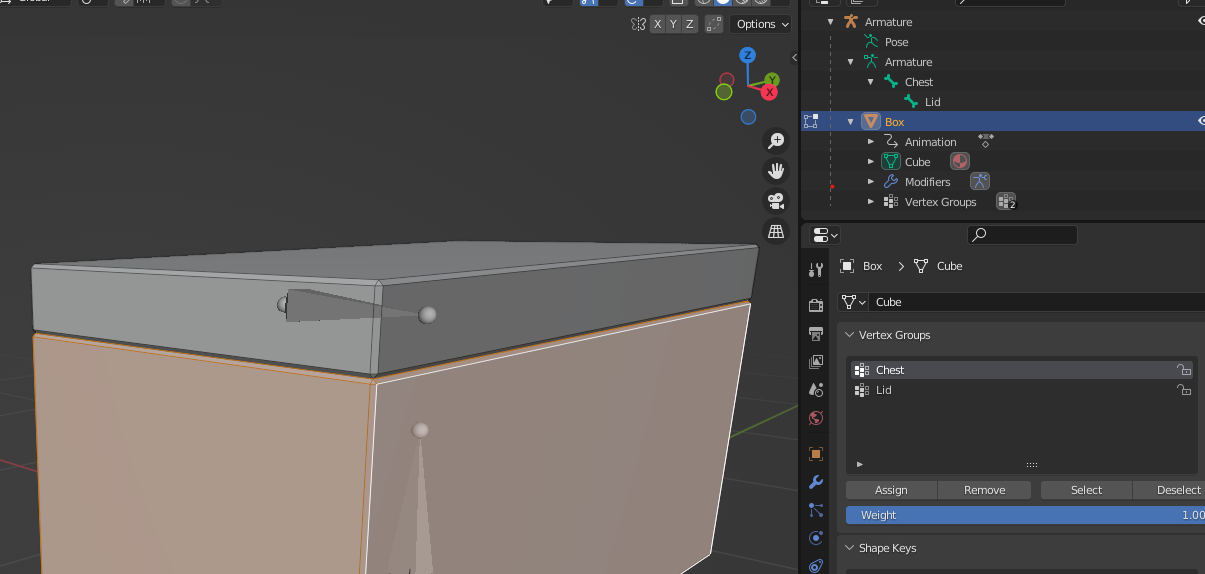
Two bones should be sufficient, one for the box and another for the lid.
Make sure to assign vertex groups to parts of the mesh so bones influence it. Vertex Group name must match the bone name.
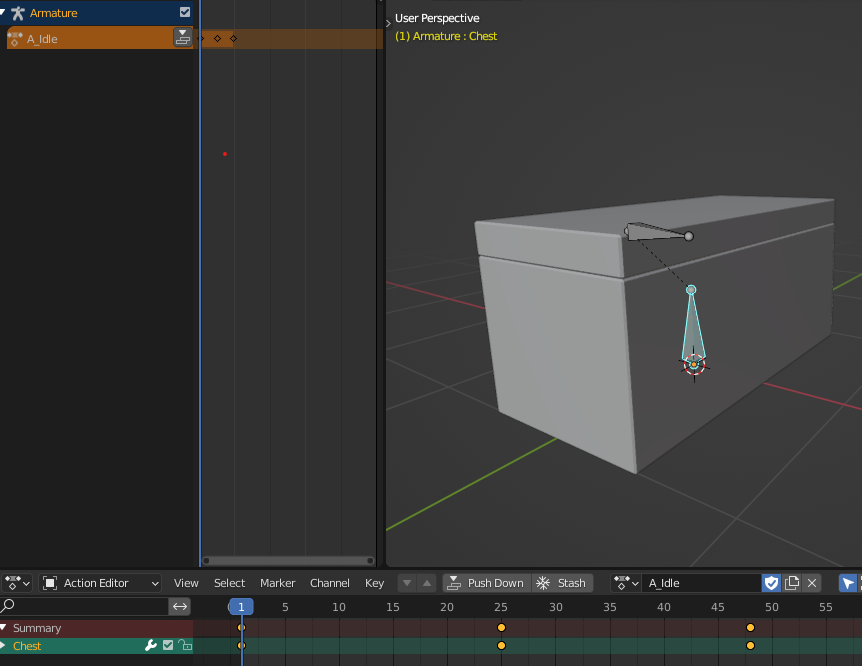
To demonstrate animation blending we will make the chest bounce abit by default. We will do that in Action Editor as we will have multiple animations. Make sure to check the Fake User toggle (shield)
or your animation might be removed after you close blender!
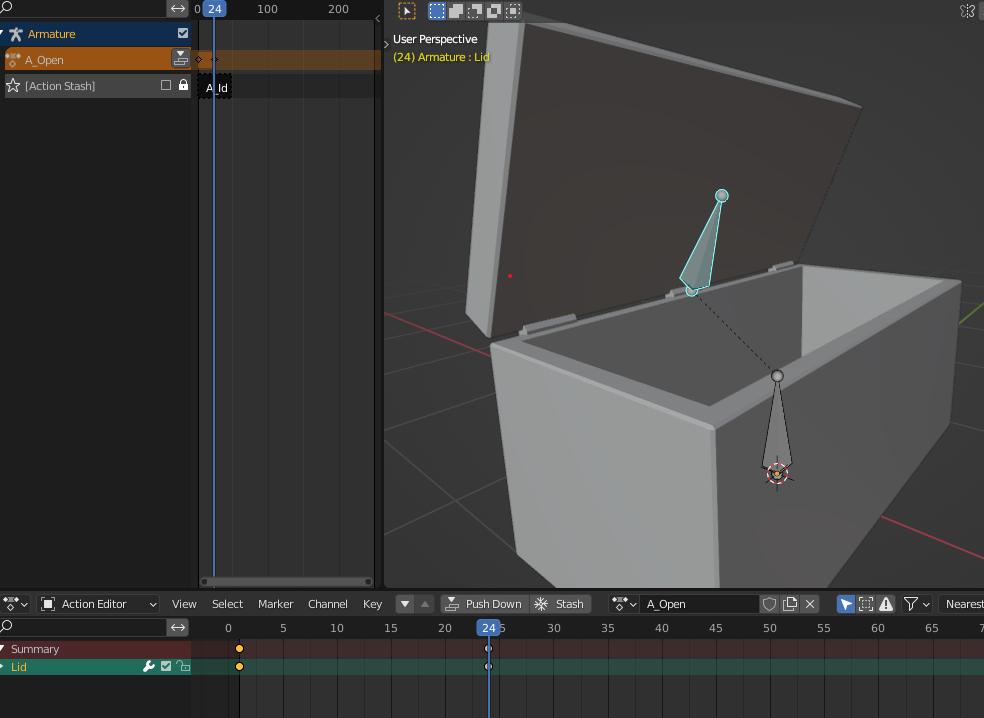
For open animation we will key the lid bone.
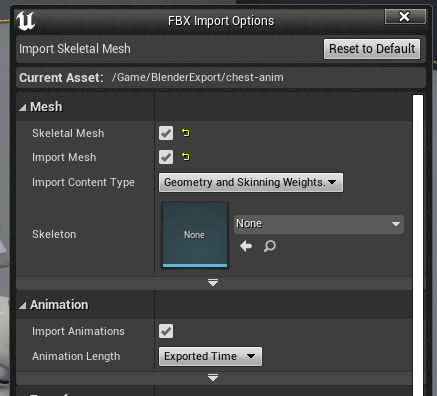
Now lets export it again, this time with animations! Replacing static mesh file with skeletal one will probably go on unnoticed by unreal, best to export it with new name or cleanup preview export.
Make sure to check ‘import animations’. To update existing animations export again to same filename.
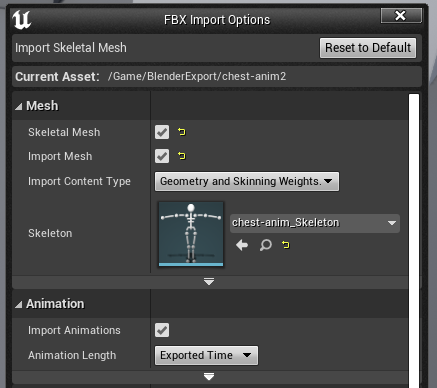
Adding new animations is quite annoying, as they do not seem to be picked up when reimporting. You have to export with different filename and during import make sure to use previous skeletal mesh so they can be used wiht it. Remove duplicate content.
After all the imports we end up with a bunch of assets, skeletal mesh, animations, skeleton.

With simple Animation Blueprint we can make the chest open and close when pawn gets near by playing relevant animation.
Bonus! LoDs
As a bonus, lets setup Level of Detail meshes for our chest! For clarity we will use a shpere as LoD 1 for our model.
We need to do few things, first is a common parent for our meshes, LoDs in the screenshot.
Make sure that Lod1 mesh also has same armature modifier as main mesh. The LoD mesh order is dependant on order they ware parented in. So parent them to the LoDs objects one by one, first LoD0, then LoD1 etc.
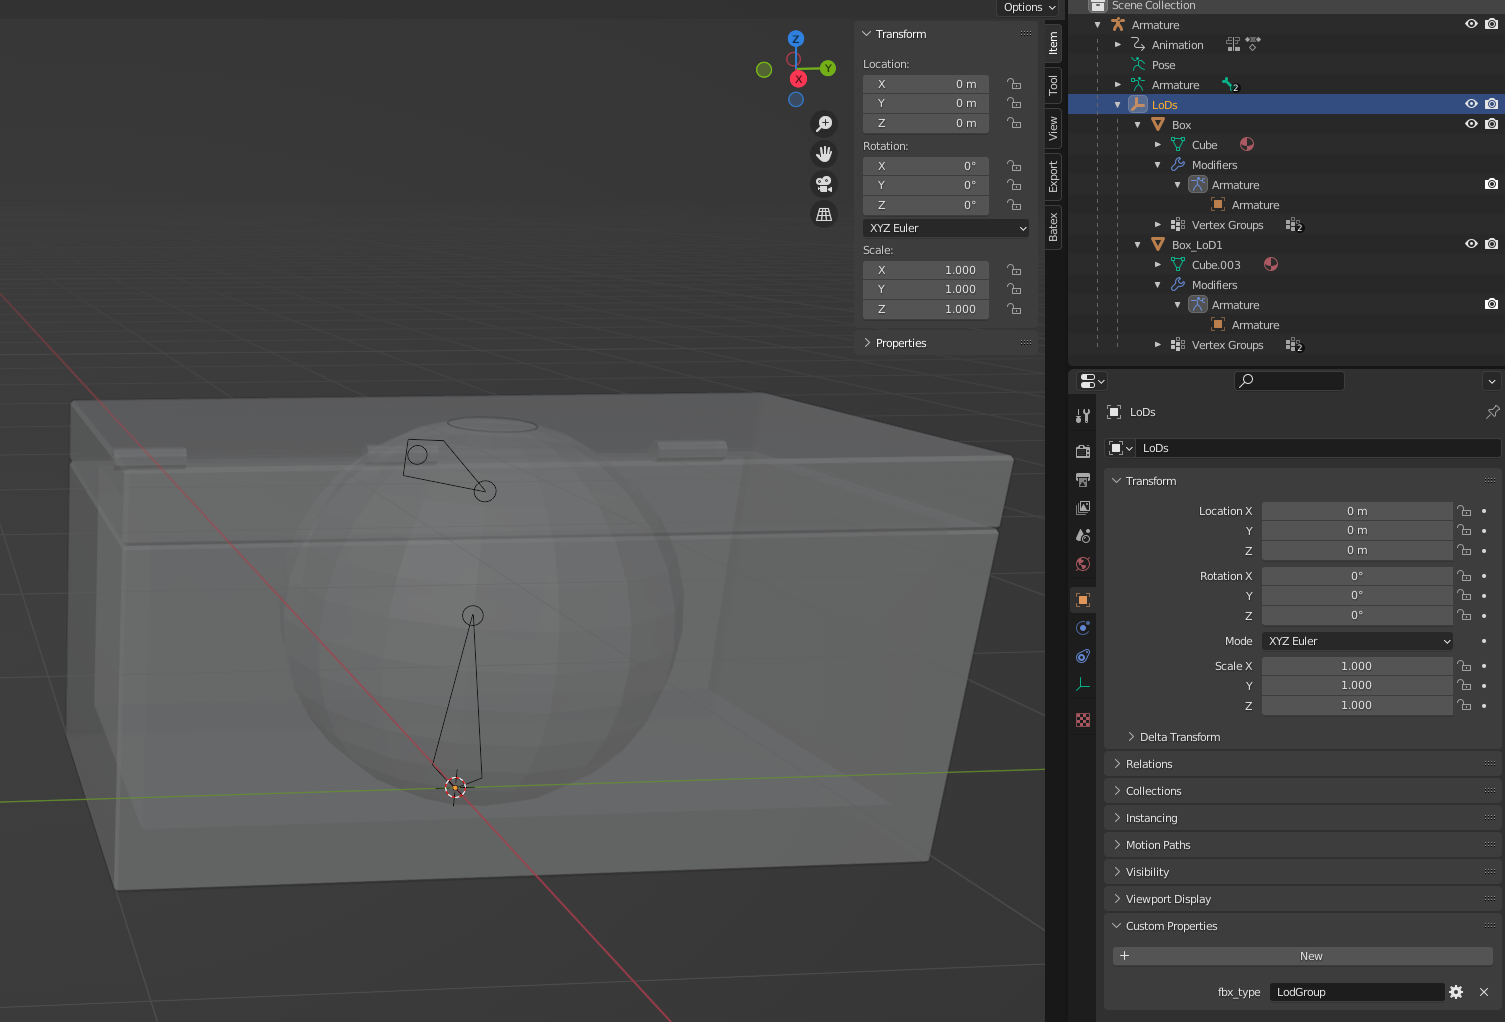
Next we need to add a Custom Property to that parent so Unreal picks it up as a LoD group.
Press ‘New’ and add a String property named ‘fbx_type’ with value ‘LodGroup’.

Once all of that is done, we can export. Make sure to check ‘Custom properties’!
It is likely that mesh ends up rotated after import. In that case you can try Apply transform (but that may break animations) or play with axis during export to fix that. For whatever reason the Empty object breaks stuff, feels like it is attached to first bone or something. Perhaps it would be just fine if first bone had default direction?
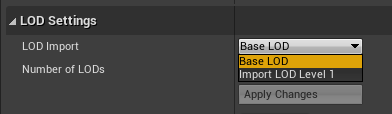
As with other things, simple remimport will probably not work. But this time it is fairly easy, in skeletal mesh lod settings select import lod1 and pick the newly exported file.
Adding LoD meshes directly to Armature does not work, they end up merged. LoDs do not have to be parrented to Armature for this to work, Empty still breaks stuff.
Here is the final result!